Signal generators are useful for testing and evaluating electronic components and devices. If you do a lot of that kind of work, you’ll probably want to go buy a decent signal generator. But you can easily spend hundreds or even thousands of dollars on one. If, however, you’re on a budget or need to generate a signal right now, you can check out RonFrtek’s Instructables tutorial to use your Arduino UNO R4’s DAC as a signal generator.
This will work with both the Arduino UNO R4 WiFi and Arduino UNO R4 Minima, because it relies on the DAC (digital-to-analog converter) built into the Renesas RA4M1 microcontroller. Most pins on development boards are digital-only, which means they can only read and write either HIGH or LOW — nothing in-between. But the UNO R4 models also have pins (A1 through A5) for analog input via ADCs (analog-to-digital converters) and analog output via the DAC on pin A0.
That DAC has 12-bit resolution, which means it can create 4096 “steps” between 0V and 3.3V. Each step is therefore approximately 0.0008V, so the generated analog waveform is smooth. That’s important for producing something like a nice sine wave, as you can do by following this tutorial.
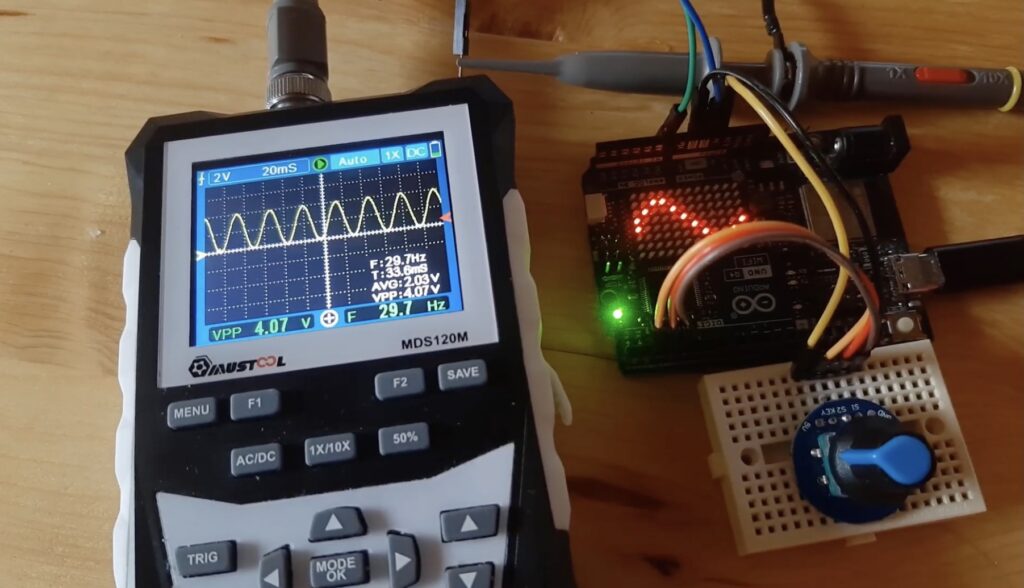
The only hardware you need other than the Arduino UNO R4 is a rotary encoder, a breadboard, and some jumper wires. You’ll probably also want an oscilloscope to see the results.
Rather than the Arduino IDE, this project illustrates how to do the programming through Visuino visual programming tool. Most of that programming is to the setup the control interface, which lets you use the rotary encoder to select a waveform (sine, square, or triangle) and its frequency. As a bonus if you use an Arduino UNO R4 WiFi board, you can display the selected waveform on the onboard LED matrix.
Then simply flash your code and you’re ready to generate signals.
The post Use an Arduino UNO R4’s DAC as a signal generator appeared first on Arduino Blog.
Read more here: https://blog.arduino.cc/2026/03/19/use-an-arduino-uno-r4s-dac-as-a-signal-generator/


