Enough theory — it’s lab time!
You’ve learned about addresses, configuration, security, and routing. Now it’s time to get your hands dirty and build a working IPv6 network. Don’t worry, this isn’t a PhD dissertation — it’s a fun, step-by-step sandbox where you’ll see IPv6 come alive.
Whether you’re a student, hobbyist, or networking professional, this chapter will help you spin up your own mini IPv6 lab in no time.
What You’ll Need
Hardware (or Virtual Setup):
- A computer or laptop (Windows, macOS, or Linux)
- Optional: a second device for testing (another laptop, VM, Raspberry Pi)
- VirtualBox, VMware, or WSL for virtual lab environments
Software Tools:
- Packet Tracer (great for Cisco-style simulation)
- Wireshark (for packet analysis)
- Ping, Traceroute, and
iporifconfigcommands - A router (real or simulated) that supports IPv6
Optional:
- Access to an ISP that supports IPv6
- Tunnel broker (like Hurricane Electric) if your ISP doesn’t
Lab Objective
You will:
- Enable IPv6 on your devices
- Set static and dynamic IPv6 addresses
- Test local and global connectivity
- Observe Neighbor Discovery Protocol
- Capture and inspect IPv6 packets
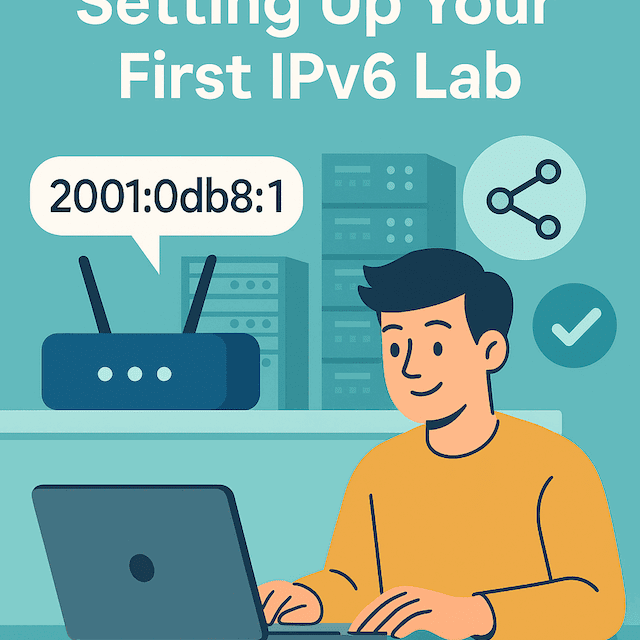
Step-by-Step: Your First IPv6 Lab
Step 1: Enable IPv6
- Most systems have it on by default.
- Confirm with:
ip a (Linux) ifconfig (macOS) ipconfig /all (Windows)
Step 2: Configure Static IPv6 Addresses
Assign each device a unique address in the same subnet:
Device 1: 2001:db8:1::1/64
Device 2: 2001:db8:1::2/64
Gateway:  2001:db8:1::ffff/64
Use /64 as the subnet prefix length.
Step 3: Test Connectivity
- Use
ping6orping -6:ping6 2001:db8:1::2 - Try
traceroute6ortracert -6to see the route.
Step 4: Observe NDP in Action
- Use Wireshark to capture RA, RS, NS, and NA messages.
- Filter for
icmpv6to see IPv6-specific discovery traffic.
Step 5: Add DHCPv6 or SLAAC
- Simulate a router sending RAs.
- Use
radvd(Linux) or router config in Packet Tracer. - Watch your host self-configure via SLAAC.
Step 6: Connect to the World
- If you have IPv6 Internet:
ping6 ipv6.google.com - If not, set up a tunnel with Hurricane Electric:
- Sign up for a free tunnel
- Configure interface and routing
Tips for a Successful Lab
| Tip | Description |
|---|---|
| Use Wireshark often | It’s your IPv6 X-ray goggles |
| Label everything | Even virtual interfaces can get confusing |
| Break it on purpose | See what fails when RA is missing |
| Capture screenshots | Great for documentation or bragging rights |
Real-World Benefit
Doing this lab proves to yourself and others that you understand IPv6 — not just in theory, but in practice. It also prepares you for interviews, certifications, or troubleshooting live networks.
Coming Up Next
Now that you’ve built an IPv6 network, we’ll finish our course by exploring real-world IPv6 adoption: who’s using it, who’s dragging their feet, and what’s coming next.
Quick Quiz: Check Your Knowledge!
- What is the prefix length commonly used for an IPv6 subnet?
- a) /32
- b) /48
- c) /64
- Which tool is used to capture and analyze IPv6 traffic?
- a) Ping
- b) Wireshark
- c) Curl
- True or False: IPv6 and IPv4 can run at the same time on the same device.
- Bonus: Name one command you can use to view your current IPv6 address.
📚 Answer Key: Chapter 8 Quiz
1. Which protocol is designed to help secure Neighbor Discovery?
✅ Answer: b) SeND
2. True or False: IPv6 automatically encrypts all traffic using IPsec.
❌ Answer: False
3. What is a common threat involving fake Router Advertisements?
✅ Answer: b) Rogue RA Attack
4. Bonus: IPv6 security advantage?
✅ Sample Answer: IPsec support is built-in and standardized.